If you have created your own logo, and you open its vector files (SVG and PDF), you might not see it as you expected. The texts of your logo on its vector file could look different as they do on their raster versions (i.e., its PNG and JPEG files). The reason - the text in a vector file is kept as letters, not as an image. These letters are styled by certain font - the one that is chosen in the logo maker. And your computer can't display fonts that are not already installed on it. It can display only its default and present ones. So, in order to open and edit a vector logo file, you have to add its font/s to your device.
Logo Maker Pro uses free for personal and commercial use. You can use the freely for you own logo design without any restrictions. In this article, we will show you how to find, download and install the fonts of your logo made with Logo Maker Pro.
1. Find and download your logo font
Option 1: Find the font name in the logo template page.
If you have chosen a logo template from our library, you can find the font details on the design page:
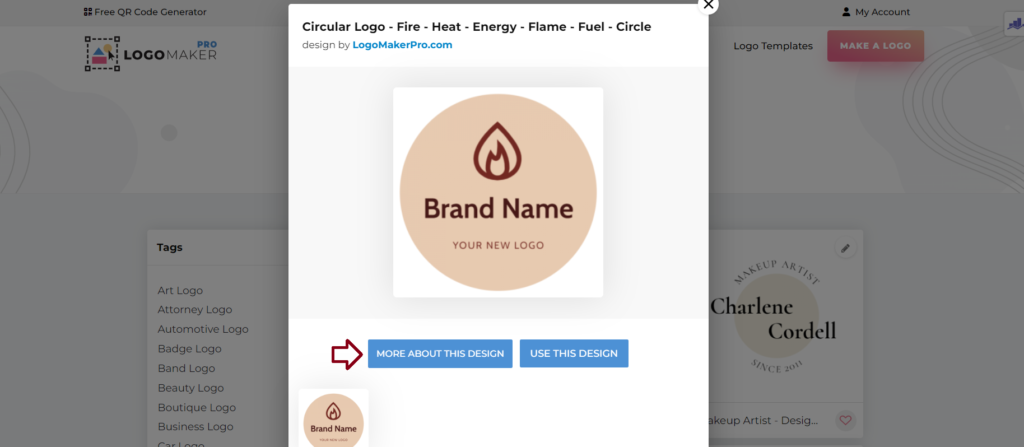
- Click on the Preview button

- Then click on the More about this design button
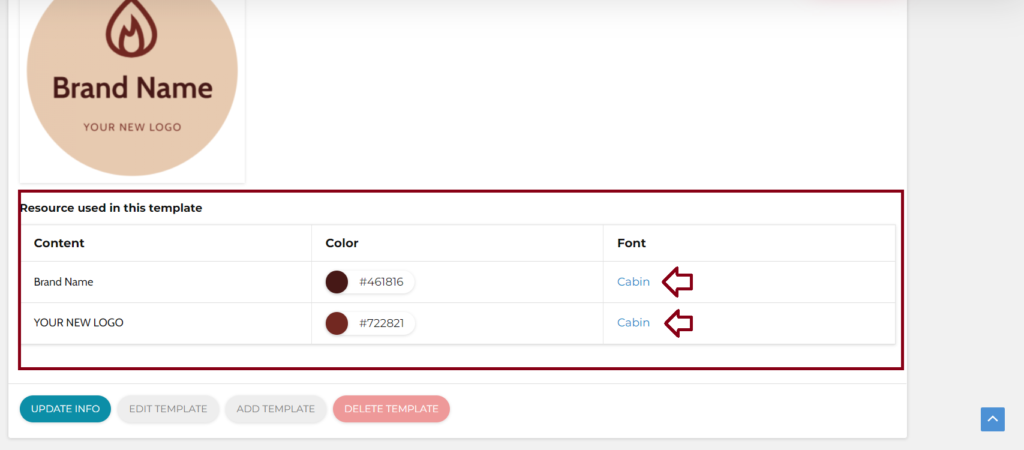
- Find the font info at the bottom of the page. There you can click on the font name to download it.
Option 2: See the font name from the logo maker.
When you choose a font from the Logo Maker Pro editor, you can see its name from the dropdown menu. Select the text and its font name will be displayed as it is shown:

Logo Maker Pro uses free for personal and commercial fonts. You can use them without any restrictions.
If you choose a Google Font, you can download from here: https://fonts.google.com/.
Any other free font is available on the web and can be downloaded from a free fonts website.
If you are using one of our logo templates, just go through the steps from Option 1.
2. Install your logo font on your PC
Download the font file, then open its TTF file.
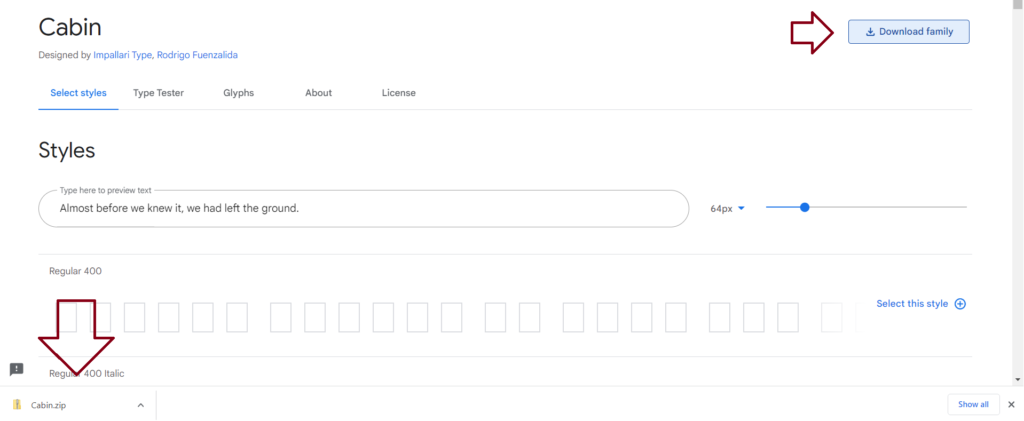
If you download a ZIP file, open its inner TTF (True Type) font files.

If you have downloaded the TTF file itself, just open it.
Click on the Install button. This is all you need to do to have the font on your PC. It automatically add it you your fonts folder.
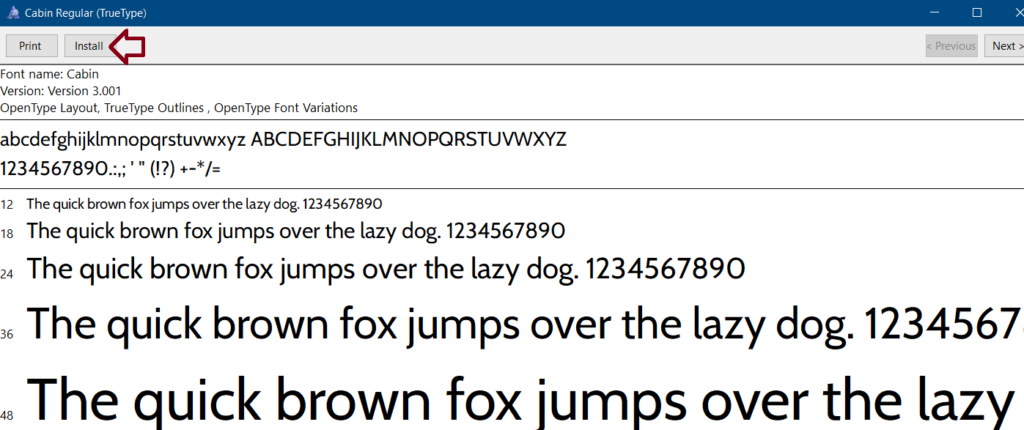
The button will dim, when the font is installed:

Close and reopen your vector logo file to see if the font is working properly. Your new font should now be recognizable by any text editing program on you computer.
Remember that anyone who opens your vector logo file, without having the used fonts, must first install them on their side. For example, if you send your vector logo to a graphic designer or a print shop, you will need to provide the font files or at least font name.
When using a vector graphic designer software, you will be able to convert the text into curves / outlines. See how bellow:
How to convert text to outlines in Illustrator
How to convert text to curves in CorelDraw
